How to Test Lawn Soil at Home: Step-by-Step
TL;DR
- You can test lawn soil at home two ways: a DIY kit for instant pH and NPK readings, or a mail-in lab sample for accurate, lab-grade results with fertilizer recommendations.
- The whole process takes about 20-30 minutes of hands-on work, plus 10-14 days of wait time if you mail a sample to a lab.
- A mail-in soil test through a university extension runs $15-$30 per sample, while a DIY home kit costs $10-$30 (HomeGuide, 2025; University of Maryland Extension, 2025).
- Done right, a soil test tells you your soil pH, nutrient levels, and exactly which amendments your grass needs, so you stop guessing with fertilizer.
What You Need Before You Start
Tools:
- A clean stainless steel or chrome trowel, soil probe, or garden spade for pulling cores. Avoid brass, bronze, or galvanized tools, which can throw off micronutrient readings.
- A clean plastic bucket to mix your soil cores. Skip metal or rubber containers, since they can contaminate the sample.
Parts or supplies:
- A DIY soil test kit such as the Luster Leaf Rapitest or LaMotte kit, or a mail-in soil mailer from your state university extension lab.
- A clean plastic or paper bag to hold the final dried sample if you are mailing it in.
Safety steps:
- Pull samples from the root zone, about 4 to 6 inches deep, where grass roots actually feed.
- Let wet soil air-dry on newspaper or a paper plate before testing or mailing. Most labs cannot process wet soil (University of Rhode Island Extension, 2025).
How Do You Test Lawn Soil at Home?
You test lawn soil at home by pulling several small soil cores from across your lawn, mixing them into one combined sample, then running that sample through either a DIY test kit or a mail-in lab. Both methods measure soil pH and the major nutrients your grass needs.
A DIY kit gives you fast answers in your kitchen, usually within minutes. A mail-in extension lab gives you more accurate numbers plus a tailored fertilizer plan, but you wait 10-14 days for results (University of Wisconsin Extension, 2026). Most homeowners pick one based on how precise they need to be.
Step 1: Decide Between a DIY Kit and a Mail-In Lab Test
Pick your testing method first, because it changes how you collect and handle the sample. A DIY kit works when you want a quick pH check or a rough nutrient read. A mail-in lab test works when you are seeding a new lawn, fighting stubborn dead patches, or want a precise fertilizer recommendation.
Accuracy is the real difference here. University research compiled by Montana State University Extension found DIY kit accuracy ranges from 33% to 94% compared to professional lab results, depending on the kit. A mail-in extension lab gives you lab-grade numbers and a recommendation written for your grass type.
| Testing Method | Cost | Turnaround | Best For |
|---|---|---|---|
| DIY home kit (Rapitest, LaMotte) | $10 – $30 | Minutes | Quick pH and NPK checks (HomeGuide, 2025) |
| University extension mail-in | $15 – $30 | 10 – 14 days | Accurate results and a fertilizer plan (Univ. of Maryland Extension, 2025) |
| Private soil lab (full panel) | $50 – $200 | 5 – 10 days | Detailed analysis with organic matter and CEC (Alluvial Soil Lab, 2025) |
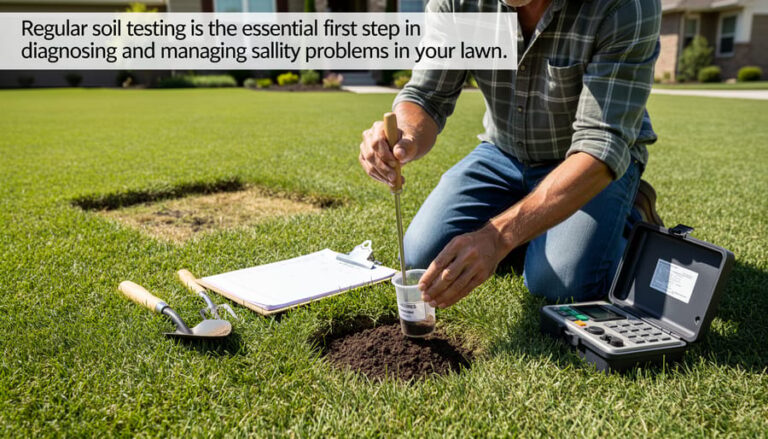
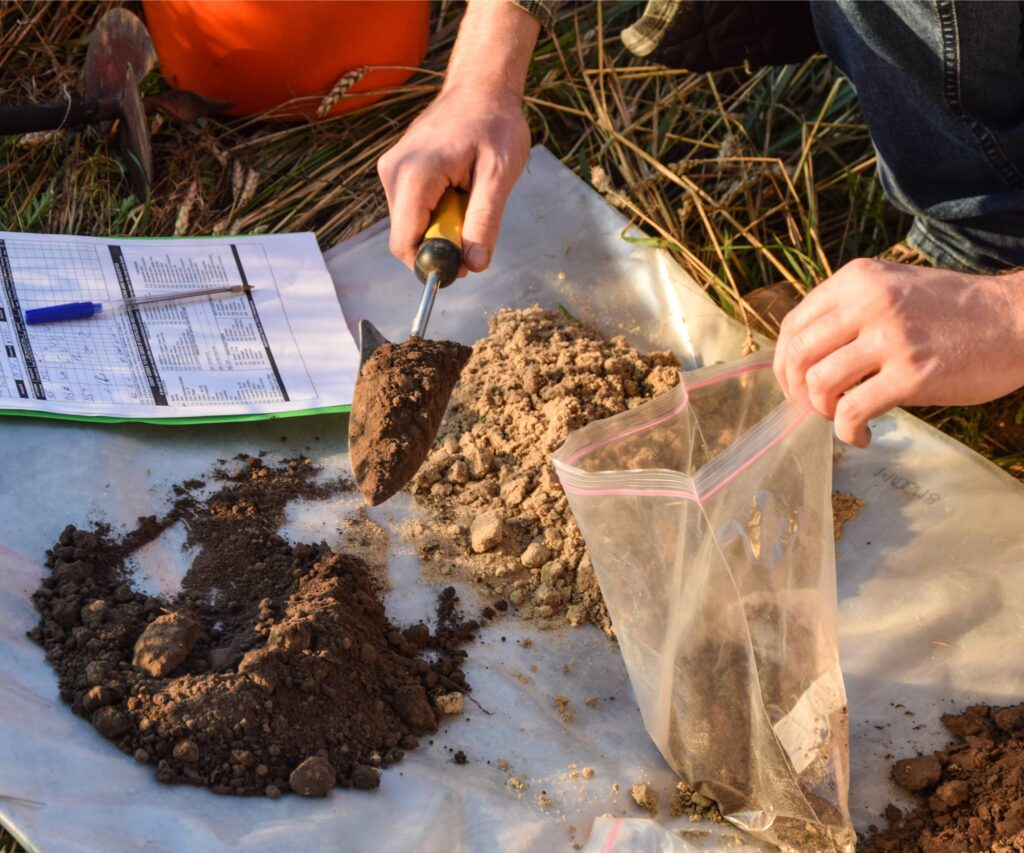
Step 2: Pull Soil Cores From Across the Lawn
Collect 10 to 15 small cores from different spots across your lawn, not one big scoop from a single hole. A single scoop only tells you about one square foot of grass. Walking a zigzag pattern across the whole lawn gives you a sample that represents the real average.
Dig each core 4 to 6 inches deep with your trowel or probe, since that is the active root zone for turfgrass. Drop each core into your clean plastic bucket as you go. Test problem areas separately if one section looks very different, like a patch that stays yellow no matter what you do.
Step 3: Mix the Cores Into One Combined Sample
Combine all your cores in the bucket and break up the clumps with your hands or the trowel until the soil is well blended. This mixing step matters because it averages out the high and low spots, so your reading reflects the lawn as a whole rather than one random core.
Pick out any grass blades, roots, rocks, thatch, and bugs. You want clean mineral soil from the root zone, not surface debris. Aim for about 1 to 2 cups of mixed soil, which is plenty for either a DIY kit or a mail-in lab (University of Wisconsin Extension, 2026).
Step 4: Dry the Sample Before Testing
Spread your mixed soil on newspaper or a paper plate and let it air-dry at room temperature, usually for a day or two. Wet soil skews chemical test readings and most labs will not accept it (University of Rhode Island Extension, 2025).
Do not bake it in the oven or microwave to speed things up. Heat can alter the soil chemistry and ruin your results. A spot indoors out of direct sun works fine. The soil is ready when it crumbles easily and no longer feels damp.
Step 5: Run the DIY Kit or Package the Mail-In Sample
For a DIY kit, follow the included instructions exactly. Most kits like the Luster Leaf Rapitest have you mix a measured amount of soil with water and a test powder, shake it, then match the color against a chart for pH, nitrogen, phosphorus, and potassium. Run each test twice and average the readings, since color matching is easy to misjudge.
For a mail-in lab, scoop your dried soil into the sample bag, fill out the information form listing “lawn” as your crop, and seal it in the postage-paid envelope. Extension mailers like the ones from Clemson ($25) and MSU ($26) include the bag, form, and prepaid envelope in one kit (Clemson University, 2025; MSU Extension, 2025).
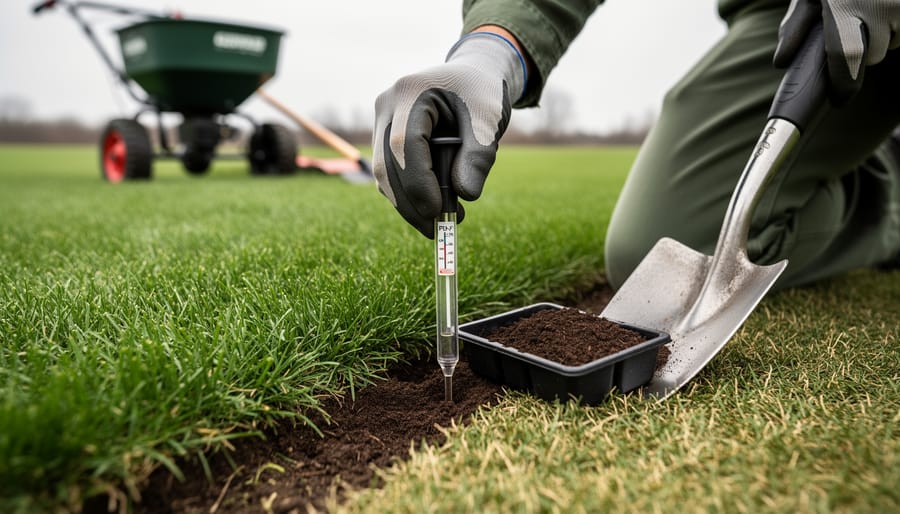
Step 6: Read Your Results and Adjust the Soil
Your results center on two things: soil pH and nutrient levels. Most cool-season and warm-season grasses grow best in soil with a pH between 6.0 and 7.0. If your pH reads below 6.0, you add lime to raise it. If it reads above 7.0, you add elemental sulfur to lower it.
Your nutrient numbers tell you what to feed the lawn. Low phosphorus or potassium points to a starter or balanced fertilizer, while a mail-in lab report spells out the exact pounds per 1,000 square feet to apply. A lab report does the math for you, which is the main reason to mail a sample instead of eyeballing a color chart.
What to Do If Something Goes Wrong
| Problem | Likely Cause | Fix |
|---|---|---|
| DIY kit colors look ambiguous or in-between | Soil-to-water ratio off, or soil still damp | Re-dry the soil fully and rerun the test twice, then average |
| Results vary wildly between two tests | Sample not mixed well, or cores from one bad spot | Re-collect 10-15 cores across the lawn and remix in a clean bucket |
| Lab rejected your sample | Soil was sent in wet | Air-dry the next sample for two days before bagging it |
| pH reads fine but grass still struggles | Nutrient deficiency or compaction, not pH | Order a full nutrient panel or check for soil compaction and thatch |
Frequently Asked Questions
How long does this take for a first-timer?
The hands-on work takes about 20 to 30 minutes to pull and mix your cores. A DIY kit adds a few minutes per test. A mail-in lab adds 10 to 14 days of waiting for your report (University of Wisconsin Extension, 2026).
Do I need to send it to a lab if I make a mistake?
No. If a DIY kit reading looks off, just re-dry your soil and run the test again. The cores you collected are fine to reuse as long as you stored the dried soil in a sealed bag.
How often should I test my lawn soil?
Test every 3 to 4 years for an established lawn, or before seeding a new one. Soil test results stay useful for about 3 to 5 years unless your grass health starts to slip (HomeGuide, 2025).
What happens if I skip soil testing?
You end up guessing with fertilizer and lime, which wastes money and can make problems worse. Adding lime when your pH is already fine, for example, can push the soil too alkaline and lock out nutrients your grass needs.
Can I use any soil test kit, or does the brand matter?
Brand matters for accuracy. Chemical kits like LaMotte and Rapitest test more reliably than cheap probe-style meters, with the LaMotte kit hitting 94% correlation with lab results in university studies (Alluvial Soil Lab, 2025). For a precise fertilizer plan, a university extension lab beats any home kit.
Quick Recap
- Pick your method first: a DIY kit for fast pH and NPK, or a mail-in extension lab for accurate, lab-grade results.
- Pull 10-15 cores from 4-6 inches deep across the whole lawn, then mix them into one combined sample.
- Air-dry the soil fully before testing or mailing, since wet soil ruins readings.
- Read your pH and nutrient numbers, then add lime, sulfur, or fertilizer based on what the results actually show.