Sprinkler Dry Spots Lawn Owners Can’t Water Away
A brown patch that stays brown while the sprinkler runs on schedule is usually a coverage gap, not a shortage of minutes. The classic sprinkler dry spots lawn owners describe sit halfway between heads, at the far edge of a spray, or behind something that blocks the water. The fastest way to know is a catch-can test: set out identical containers, run the zone, and compare. If the cans under the dry patch come up short, it is coverage. If they fill evenly, look at the soil. Warm-season and cool-season grasses show the gap at different times of year, so read the pattern against your grass type.
Start at the Dry Patch and Work Backward
Most advice about dry spots starts with the sprinkler and works forward. That gets expensive, because it assumes the equipment is the problem. Start with the patch instead and ask four questions before you touch anything.
- Where exactly is it? Between two heads, at the outer edge of the throw, next to pavement, under a tree, or on a slope or high point.
- What shape is it? A straight band, a crescent, a wedge, or an irregular blob with hazy edges.
- When did it appear? Every summer in the same place, or suddenly this season.
- Does the grass pull up easily? Grass that lifts like loose carpet points somewhere other than water entirely.
The answers sort the problem into one of three buckets: water is not landing there, water is landing but not soaking in, or water is not the problem at all. Each bucket has a different fix, and adding run time only helps one of them, and not reliably.
If you are not sure what "enough water" should look like for your grass in the first place, the lawn watering guide by grass type and season covers the baseline before you start troubleshooting the exceptions.
Reading the Shape: What Each Pattern Usually Means
The shape of a dry patch is the best free clue you have. None of these is a certain diagnosis on its own, but each points to a likely starting place.
| Pattern | Most likely cause | What to check first |
|---|---|---|
| A straight stripe halfway between two heads | Sprays do not reach each other | Whether each spray lands near the next head |
| A crescent or ring at the outer edge of the throw | Low pressure or a spray that falls short | Throw distance compared with the other heads |
| A wedge or shadow behind a shrub, post or new bed | The spray is physically blocked | Anything that grew or was added in the spray path |
| A strip along a driveway, walk or curb | Heat reflected from pavement plus thin soil at the edge | Soil depth and whether the spray reaches the edge at all |
| An irregular patch with wispy, hazy edges | Water-repellent soil | A cross-section dig after watering |
| A patch on a mound, slope top or high spot | Runoff before the water soaks in | Whether water runs off during the cycle |
| Grass lifts like carpet or the patch keeps spreading | Not a water problem | Roots, insects or disease |
The first three are coverage problems. The next three are about the site and the soil. The last one is a different diagnosis entirely, and it matters to rule it out early, because watering a lawn with a root problem can make things worse.
Sprinkler Dry Spots Lawn Owners Can Confirm With a Catch-Can Test
A catch-can test measures how much water actually lands on each part of the zone. It turns a guess into a comparison.
New Mexico State University's Cooperative Extension guide H-510, "How to Perform a Catch Can Irrigation Audit on a Home Lawn Sprinkler System" by Cheryl Kent and Bernd Leinauer (read on 2026-09-27 at NMSU's publication page), lays out the full method. The main points:
- Use identical containers. The guide calls for a minimum of 24 catch cans for reliable results.
- Place them in a grid. For fixed spray heads in irregular areas, which describes most home lawns, it places the cans in a rough grid about 5 to 8 feet apart within the zone.
- Run the zone for its normal time. You want to measure what the lawn actually gets on a normal day.
- Compare the lowest quarter to the average. The guide calculates distribution uniformity by averaging the quarter of the cans with the least water, dividing by the average of all cans, and multiplying by 100.
For fixed spray heads, the guide rates a uniformity of 0.75 or higher as excellent and 0.55 as good, which it treats as the minimum acceptable level. Below that, some part of the zone is getting noticeably less water than the rest, and that part is often your dry patch.
For a quick home check, you do not need the math to learn something. If the cans sitting in the brown area hold clearly less than the cans in the green area, you have confirmed a coverage gap. Put a couple of cans directly inside the dry patch on purpose so it is represented.
If the Cans Come Up Short: Coverage Causes
When the dry patch gets less water, the cause is almost always one of these:
Sprays that do not overlap. Even coverage depends on each spray reaching the neighboring heads. When they fall short, the area in the middle gets only the thin outer edge of each spray.
A head that is sunk, tilted or blocked. Grass and thatch build up around heads over the years. A head that sits low or leans sprays into the turf right in front of it instead of across the lawn.
Something new in the spray path. A shrub that filled out, a new planter, a mailbox post or a garden bed can cast a "rain shadow" that matches the shape of the object.
Low or uneven pressure. If several heads on one zone throw short, the zone may not have enough pressure to run them all properly.
A replaced part that does not match. A head or nozzle swapped at some point may throw a different distance or put down water at a different rate from its neighbors.
Our lane here is the diagnosis. How to repair or redesign the system itself depends on your equipment, so check the manufacturer's instructions for your heads or call whoever installed or services your irrigation. What the diagnosis tells you is just as important: the fix for a coverage gap is fixing coverage, not running the whole zone longer. Extra minutes overwater the areas that were already fine to push a little more into the one that was not.
If the Cans Fill Evenly: The Water Is Landing but Not Soaking In
This is the result most people do not expect, and it changes everything. If the dry patch receives as much water as the green grass around it, the problem is below the surface.
Water-repellent soil. Kansas State University's turf blog (Megan Kennelly, "Localized dry spot in sand-based putting greens," read on 2026-09-27 at K-State Turf and Landscape) describes how soil can become hydrophobic from a build-up of water-repellent waxy substances around soil particles, and notes the resulting patches often take odd shapes with wispy, hazy edges. The post is written about golf greens, but the same irregular pattern shows up in home lawns with sandy or thatchy soil. The post names thatch management and wetting agents as the management approaches.
Compaction. Soil that has been walked, driven or played on hard will shed water sideways instead of taking it in. A long screwdriver that will not push in where the grass is brown, but slides in easily nearby, is a strong hint. Why compacted soil stops grass growth walks through how to confirm it.
Shallow or poor soil. Along driveways, over buried rock, construction debris or a shallow utility line, the root zone may be too thin to hold water through a warm afternoon.
Runoff on high spots. On a slope top or mound, water runs away faster than it soaks in. Watching the zone for a few minutes during a normal cycle usually shows this.
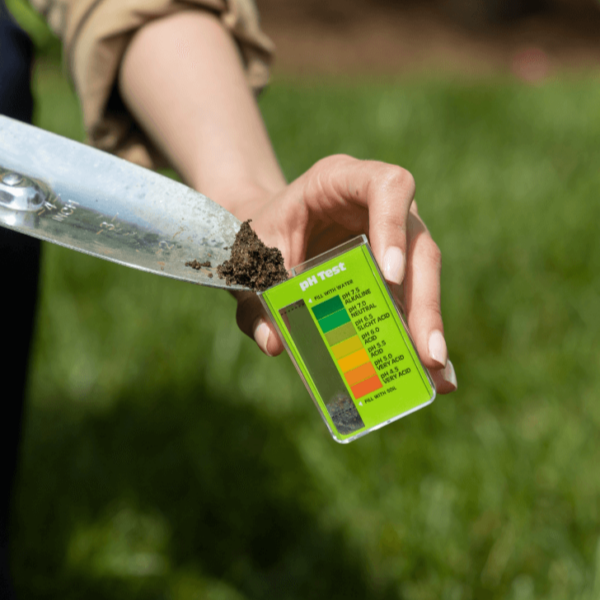
To tell these apart, water the area normally, wait about an hour, then dig a small slice with a trowel through the dry patch and through healthy grass nearby. Compare how deep the moisture went. Dry soil under a wet surface points to repellency or compaction. Moist soil with dead roots points away from water altogether. If the water is running off rather than going in, the article on why your lawn still looks dry even after watering covers the soil side in more depth.
When It Is Not a Water Problem at All
Some brown patches only look like dry spots. Before you spend a season chasing coverage, rule these out:
- Grass lifts like carpet. Root-feeding grubs can cut roots so the turf peels back. See signs of lawn pest damage for what to look for.
- The patch has rings, spots on the blades, or a clear border that grows. That pattern suggests disease, not drought.
- It appeared suddenly after a spill, a fertilizer application or a parked object. Chemical burn and heat from objects can mimic drought.
- Heavy shade and tree roots. Grass under trees competes with roots for water and light, and it may thin regardless of how much water lands.
If a patch keeps spreading, has an unusual shape or color, or does not respond once coverage and soil are sorted out, take a sample or photos to your local Cooperative Extension office or a lawn-care professional. A proper diagnosis costs far less than a season of guessing.
Grass Type and Season Change What You See
Cool-season grasses such as Kentucky bluegrass, tall fescue and perennial ryegrass show coverage gaps most in mid to late summer, when heat stress is highest and they are closest to dormancy. Warm-season grasses such as Bermudagrass, zoysiagrass and St. Augustinegrass are actively growing in summer, so a gap can show during a dry spell in their growing season, while a fully dormant warm-season lawn in winter is tan everywhere and tells you little about coverage.
That matters for timing the test. Run your catch-can check during the season your grass is actively growing, and on a calm day, since wind distorts sprays. A test done on a windy afternoon can create a dry spot on paper that does not exist on a still morning.
A Simple Order of Operations
- Map the patch: location, shape, timing and whether grass pulls up.
- Rule out pests and disease with the pull test and a look at the blades.
- Run a catch-can test on the zone, with cans inside the brown area.
- If the cans come up short, address coverage and leave the run time alone.
- If the cans fill evenly, dig and check soil moisture, compaction and depth.
- If the patch still spreads or does not recover, ask your local extension office.
FAQ
Should I just add more minutes to the zone with the dry spot?
Usually not. If the dry spot is a coverage gap, extra minutes mostly add water to areas that were already getting enough. If the soil is repelling water, more water may simply run off. Diagnose first, then adjust.
What containers can I use for a catch-can test?
Any identical straight-sided containers work, because the point is comparing them to each other. New Mexico State University's guide calls for at least 24 cans for a reliable audit, though fewer can still show an obvious gap in a small area.
Why is the dry spot always in the same place every summer?
A patch that returns in the same spot year after year usually has a fixed cause: a spray that never reaches, a blocking object, a high spot, or shallow or repellent soil. Something that moves or spreads points more toward pests or disease.
Can hydrophobic soil happen in a home lawn?
Yes. Research on water-repellent soil often focuses on golf greens, but sandy and thatchy home lawns can develop the same irregular patches that stay dry even when water lands on them.
When should I call someone instead of fixing it myself?
Call your local Cooperative Extension office or a lawn-care professional if the patch spreads, shows unusual rings or discoloration, or does not recover after coverage and soil are addressed. For repairs to the irrigation system itself, the installer or the manufacturer's instructions are the right place to start.